
Prefer to listen to the podcast version of this guide?
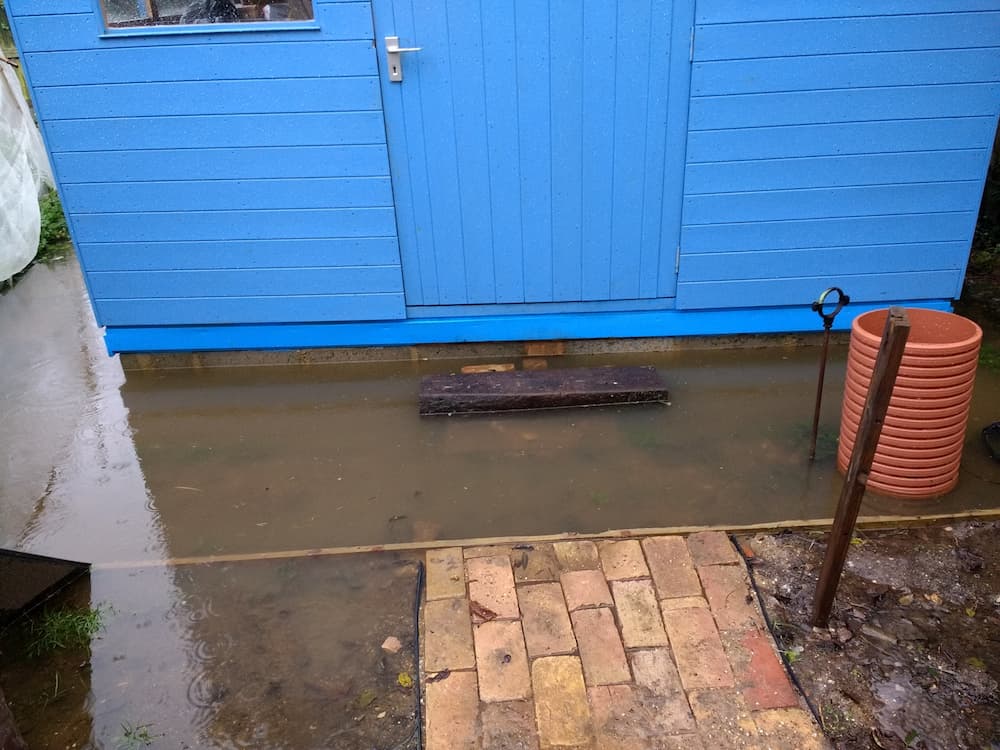
“Water is pooling against the foundation of my house. Is this a big deal?”
Absolutely!
Whether you just bought a new house or you’ve been dealing with the issue for years, rainwater and groundwater pooling against the foundation of your house is more than annoying or unsightly. Water collecting against your foundation is also likely seeping into your basement, crawlspace, or under your home’s foundation. This water can result in the formation of mold, wood rot, or structural damage due to the erosion of the earth beneath your foundation—compromising the structural integrity of your house.
Why is rainwater pooling against my house?
There are a variety of reasons why water is pooling around your house and it usually depends on where the water is coming from.
Is the water coming off of your roof?
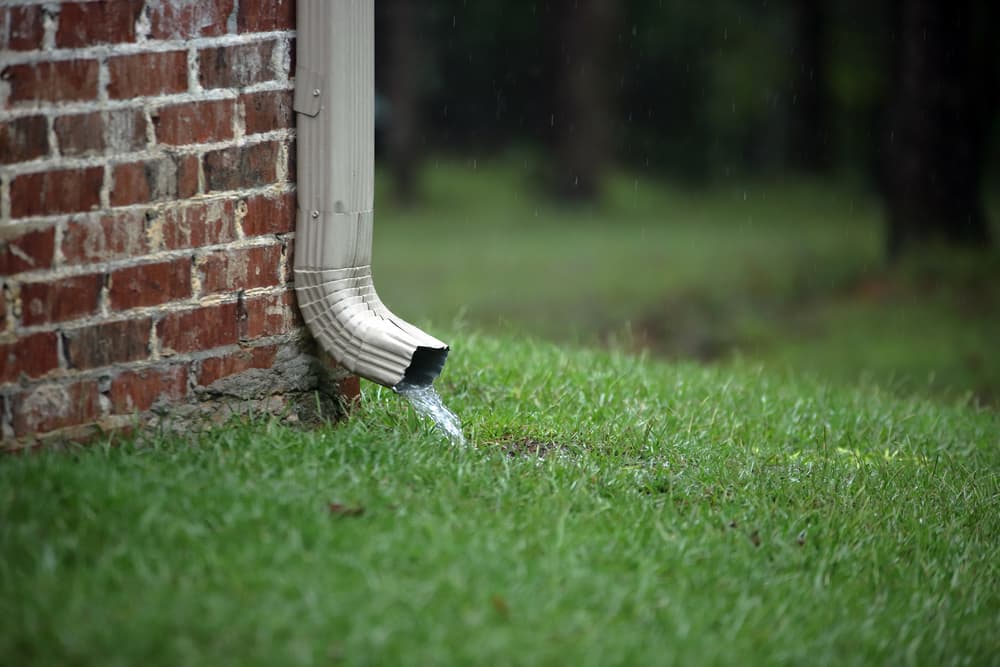 Without a downspout extension or proper outlet pipe, this rainwater may seep right back into your home's foundation.
The problem-causing water could be coming right off of your own roof—maybe your gutters are clogged, your gutter system lacks downspout extensions that would ordinarily send rainwater away from your home, or you may not have downspouts at all! Before taking care of water management issues on the ground, make sure your own roof isn’t responsible for your yard flooding headaches. Keeping your gutters clean and carrying water away from your house will go far in terms of keeping your foundation dry. In the end, fixing any roof drainage issues may also eliminate many flooding or erosion issues on the ground following heavy rain.
Is the water flowing toward the house from your yard?
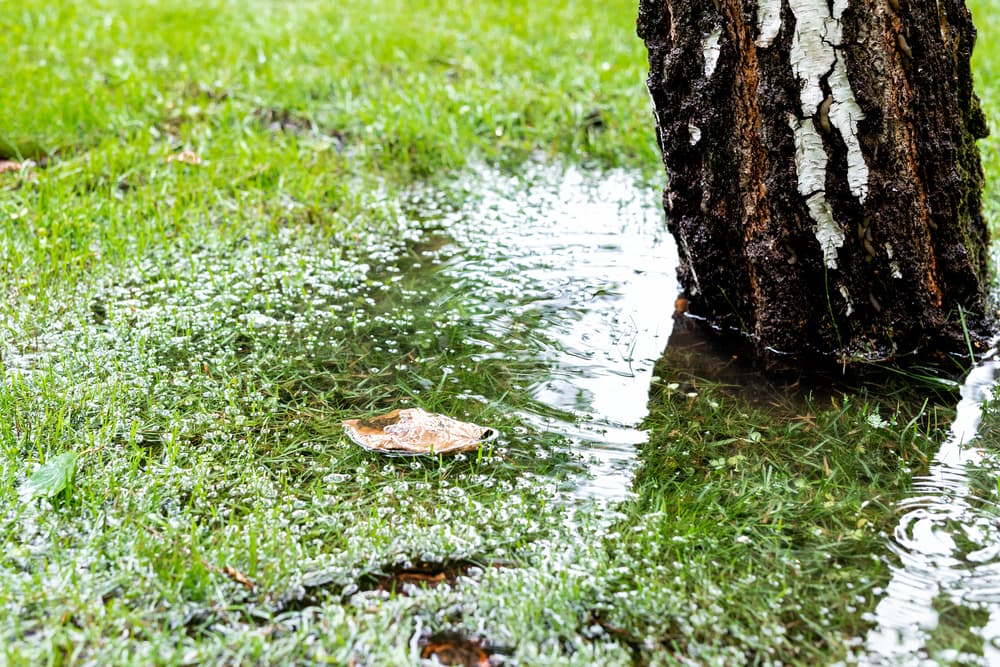 If you have flooding in your yard, depending on the grade of the terrain, water may end up flowing right up next to and into your home's foundation.
If you’ve noticed that water pooling against your home is coming from the yard, the slope of your yard is likely to blame. Whenever your yard is dry, walk the grounds—visually inspecting which way the yard slopes as well as feeling any “fall” that requires you to steady your balance. Carefully walk around the perimeter of your home and use your balance to feel if the yard is sloping towards your foundation wall, crawlspace, or basement windows (or where basement windows would exist).
Stand where water runoff pools the most and face your house with your feet side-by-side. Do you find yourself balancing more weight on your heels or your toes? If you find yourself having to keep from falling toward your house, you likely have a negative grade—or negative slope—that is sending water along and likely beneath your house.
What is a negative yard grade?
 Without the right drainage systems, this backyard's negative grade (or negative slope) back toward a house could result in significant foundation damage due to water seepage.
A negative yard grade, also known as a negative yard slope, is a span of terrain that angles down in a decline toward a structure—such as a house. Water runoff will always find its lowest position—whether that is downstream or under your house. Like a giant waterslide, a negative slope or grade allows surface water to follow gravity toward the foundation of your home or other structure—often seeping through concrete or brick. And as we mentioned earlier, such negative slopes or grades can result in drastic water damage to the foundation of your house.
How do I fix a negative slope toward my house?
.jpg) It looks like this homeowner is just about ready to build a positive slope away from their home's foundation!
It looks like this homeowner is just about ready to build a positive slope away from their home's foundation!
To eliminate a negative slope toward your house, the most important next step is to create a positive slope leading down from your home—a slight hill that water cannot climb or penetrate. This helps keep your home on the high ground and out of the path of flowing surface water.
In addition to building a positive slope away from your home’s foundation, you will also need to create an outlet for such flowing water—or else you may simply keep water at arm’s length to continue to pool at the base of your positive slope. We’ll discuss such options later in this guide. But for now, you’ve got a positive slope to build!
How much of a positive slope do I need to offset a negative slope?
To build a protective positive slope to shed water away from the foundation of your house, you will not only need to counter the negative slope (which would simply make it level), but surpass it. For this reason, it is recommended that you have at least 1 inch of slope away from your house for every 1 foot out—for the first 5-to-10 feet around the perimeter of your foundation—preferably even more.
Proper Positive Slope Envisioned
To help you better envision what proper positive slope looks like with 1 inch for every 1 foot of fall, we will use the following example. Imagine that you have a 4-foot long level. If you were to place this level's end against the lowest section of exposed foundation and extend the other end towards the yard, while keeping the bubble in the center, the opposite end of the level would be no less than 4 inches off of the ground.
.jpg)
Don’t Bury Basement Windows or Crawlspace Vents
“But what if my basement windows or crawlspace vents will be below a positive slope?” To keep your crawlspace vents or basement windows from getting buried, specialized window wells should be installed to keep out dirt and moisture.
.jpg) Window wells are a must for keeping dirt and moisture out of your basement windows and crawlspace vents when creating positive slope against your house.
Window wells are a must for keeping dirt and moisture out of your basement windows and crawlspace vents when creating positive slope against your house.
Necessary Tools & Materials for Building Positive Slope
- A level—preferably a 48in. I-beam level or a string-level with stakes
- Ample dense clay soil dirt mixture
- A sturdy shovel
- A dirt rake
- If you have basement windows or lower crawlspace vents, metal window wells
- A wheelbarrow if you’re not using earth-moving equipment
Optional Time-Saving Equipment
- Heavy wooden pallet with rope dragline
- Skid steer loader (available for rent)
- A lawn roller or hand tamper
How much does it cost to fix a negative yard slope?
If you plan to hire professional landscapers or drainage specialists to create a positive slope against your yard, you may pay anywhere from a few hundred dollars to around $2,000 or more for labor, materials, and use of heavy equipment. On average, the cost of the necessary amounts of dirt and delivery can range anywhere from several hundred dollars to nothing—if you find someone in your community looking to offload some dirt (maybe they dug a swimming pool or pond) and the necessary truck or trailer.
Can I fix a negative yard slope by myself with hand tools?
For smaller positive-slope building jobs, you can certainly use shovels, wheelbarrows, dragged crates, tampers, and back strength to create the intended effect. However, for medium-to-larger jobs, using limited manpower and hand tools will require additional time and energy. If you plan to rent some earth-moving heavy equipment, such as a skid steer loader, rental rates can run from around $300 a day or $1,000 a week. While these can seem steep, it may be worth your money to save your time and your back.
How to Fix a Negative Yard Slope, Step-by-Step
- Assemble all materials and tools necessary.
- If there is grass or plants against the side of your home where there is a negative slope, you may consider preserving such growth. Use a shovel to carefully remove the top layer of sod to be placed elsewhere. Carefully unearth plants for replanting later. You should plan to do this for all plant growth about 6-10 feet against your house.
- If the area contains basement windows or crawlspace vents, install window wells around them so they don’t wind up buried. You may need to shovel away a bit of the dirt below them to get the window wells to fit as well as caulking where the wells make contact to keep moisture from seeping through.
- Begin moving loads of dirt at the base of the house—adding a few inches of dirt and tamping them down with the tamper, lawn roller, or skid-steer loader bucket. You should aim to create a sloping berm rolling away from the footings of the house.
- To make sure you are creating an adequate amount of slope, periodically use your level to make sure you’re achieving at least 1 inch per foot a positive slope away from the house. You can do this by holding the end of your longer I-beam level against the edge of the house at the top of the slope and extending it with the bubble between the two lines. For a 4-foot level placed at the top of the slope and extended level, the opposite end should be at least 4 inches off of the ground—preferably more, though.
- With a rope tied to one side for easy dragging, you can drag a wooden pallet to smooth out areas of dirt. This should be followed up with periodic tamping. This is a cheap and easy alternative to raking dirt into position.
- Check the slope levels frequently—especially after tamping down dirt. Make adjustments by adding dirt and tamping as necessary until an adequate positive slope is achieved.
- Once the ideal amount of even positive slope is achieved, if you removed any grass or plants from the area, you can restore them to their original location. Make sure to double-check the amount of fall of the slope once any elements are restored to ensure you still have a positive slope leading up to your home.
And that’s it! You have achieved a positive slope or grade toward your home. Keep a close eye on the area after the next rain to ensure the slope is functioning properly and no water pools next to your home or permeates the slope you have created. Hopefully, you will have compacted the soil enough to not allow water to seep through your new slope.
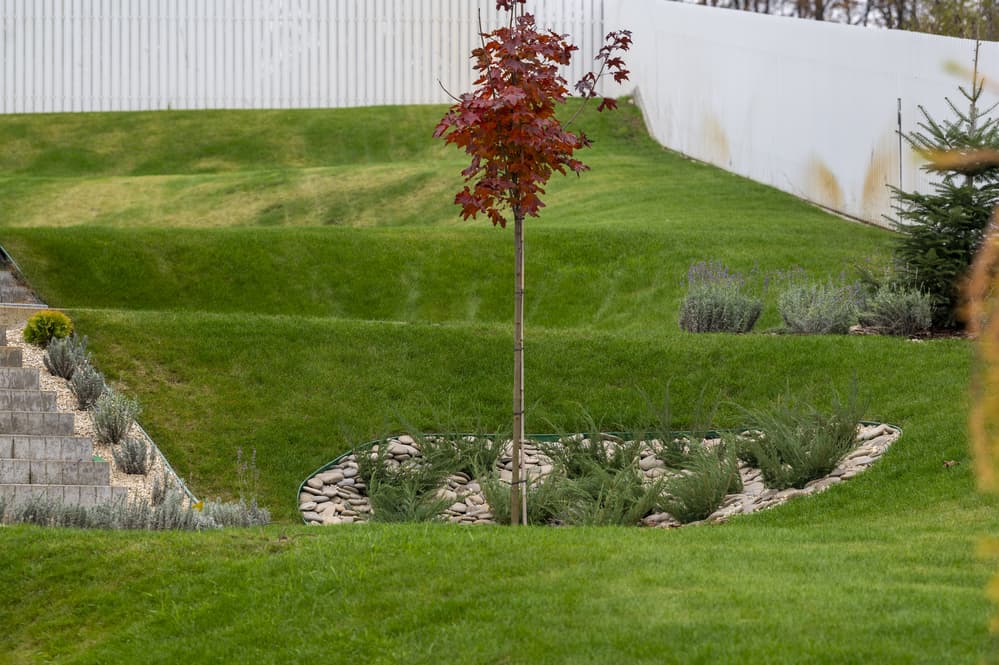
Secondary Water Pooling & Drainage Systems
So, you’ve successfully kept the water away from your home. What happens if the water has nowhere else to go and begins pooling in your yard?
Water will always travel to its lowest possible location. Just because you have kept the water from pooling against your home doesn’t mean your work is done. If the runoff is now trapped in the low-lying areas of your yard and resulting in stagnant water pools, installing the proper gravity-based drainage system will help divert any surface water to a stormwater reservoir—such as a street storm gutter or nearby creek. To assist you with this effort, we’ve created a similar step-by-step tutorial on how to install a French drain in your yard. Channel drains, trench drains, or catch basins are also very popular drainage solution options.
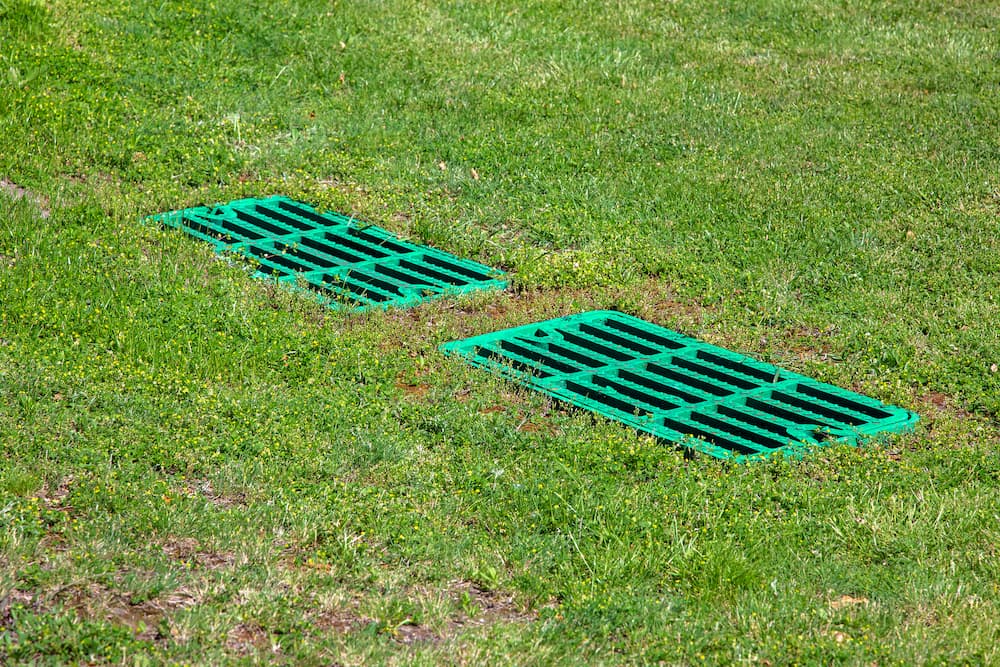 After you've successfully built up positive slope away from your house, you can also take that same water to storm sewer or other drain using a channel drain, catch basin (pictured), or a French drain.
Where can I rent heavy equipment to make landscaping jobs easier?
To make short work of more labor-intensive landscaping jobs, renting the right equipment can make all the difference. Fortunately, you have several options for renting said equipment. Many local hardware stores can offer heavy equipment rentals. Also, using your zip code as a search filter, you’re invited to search through the heavy equipment rental listings from your friends at My Little Salesman to find the equipment you need from a dealer in your neck of the woods.